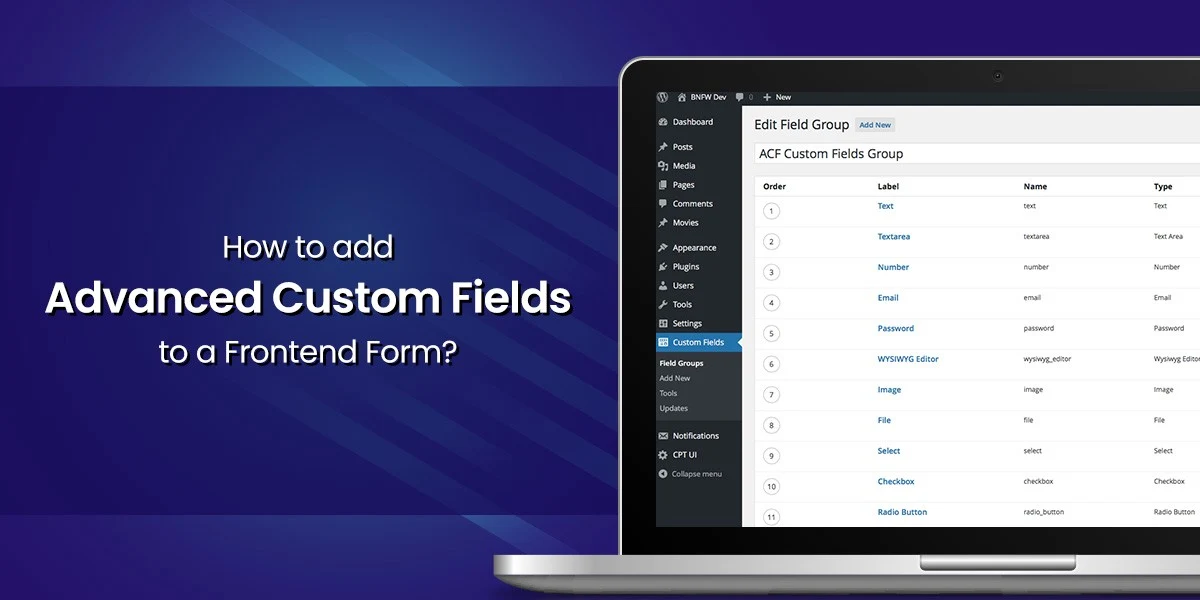
To understand both backend and frontend custom fields, we suggest you to check our already shared blog on how to add custom fields in the backend.
If you have checked the info of backend custom fields, now able to add information to your custom fields, associate it with the relevant post type, and store it in your database.
However, there’s still one potential problem: the information from your custom fields doesn’t appear anywhere on the frontend yet!
That is, even though you’ve added some custom fields to the editor for your blog posts, your blog post still just looks like a normal blog post on the frontend.

There are a few different ways you can display Advanced Custom Fields data on the frontend of your site. The exact method you choose will depend on your needs and knowledge level. Here are three different ways to achieve that:
- Your theme’s template files — this requires a little technical knowledge, but it’s the best approach most of the time, especially if you’re comfortable working in your theme’s template files.
- With a shortcode — this is super simple and a good option if you just want to insert custom field data on a case-by-case basis. However, it requires a lot more manual work because you’ll need to add shortcodes to every post.
- With Elementor Pro — this is great because it completely eliminates the need to work with PHP, but it’s a premium product and it also means you’ll need to use Elementor Pro for your templating.
You can click above to jump straight to a specific method or you can read through all of them. Up to you.
Here, we are going to share how to display Advanced Custom Fields with Elementor Pro.
Elementor is one of the most popular WordPress page builders. It lets you build your designs using visual, drag-and-drop editing.
With Elementor Pro, the paid add-on, you can also build your theme’s template files, including an option to insert dynamic custom field data from Advanced Custom Fields into your designs.
This is a great option if you want the flexibility to automatically include custom field data in your templates, but don’t feel comfortable making direct code edits to your theme’s template files.
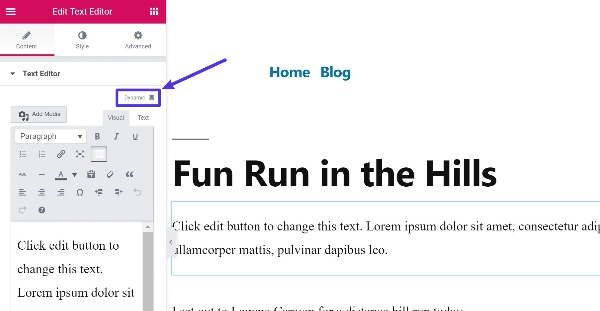
To get started, you’d go to Templates > Theme Builder and create a new Elementor template for your post Single:

You could add the regular Elementor widgets for your Post Title and Post Content. Then, to display the custom field data, you’d add regular Text Editor widgets. The only difference here, instead of editing the text, you’d select the Dynamic option:
After this, you can select ACF Field from the drop-down:

From there, you can select the specific field you added with Advanced Custom Fields:
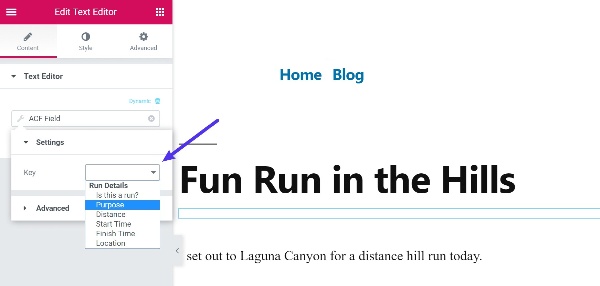
And you can also use the Advanced accordion tab to prepend or append information, which lets you add labels and units:

Now just repeat for other custom fields!
Note:- Using Advanced Custom Fields, you can enrich your pages and blog posts with more data and information with an easy-to-use solution. More: you can start to collect additional information for any content on your site and then display it on the frontend for your visitors.